#TWKatHome Activities
Does Anything Grow in Winter?
Welcome to TWKatHome, our fun, free online content that helps kids and families explore food and build positive, healthy eating habits. As we shift into fall and winter, we are changing our focus to Food Happenings, connecting food to current events. In the coming months, we will be exploring how food can help create a better understanding of the events around us.

In this week of Food Happenings we are talking about seasonality as we settle into winter. We will answer the mystery of whether anything grows during these cold months and do a fun activity around sharing our food with those who need it most right now!
TasteWise Kids - are you hungry for some learning?
Did you do a TWKatHome activity? Share what you learned or created from the activity on our social media! We’d also love to hear your ideas for what other content you’d like to see from TWKatHome. Share with us on Facebook (@TasteWiseKids) or Instagram (@tastewise_kids) and use the hashtags #TWKatHome and #myTWKsalad, or email info@tastewisekids.org.
Let's Explore The Winter Solstice
Next Week is the Winter Solstice, the day of the year with the fewest daylight hours. On December 21st, we’ll get only nine and half hours of sunlight, can you believe it?! The good news is that after the solstice passes, we begin slowly gaining more daylight hours all the way until summer!

What Does This Mean for Farmers and Crops?
Not only does winter mean shorter days, it also entails other changes in the weather. The average winter day in Baltimore is only about 30 degrees. The colder temperatures also result in stubbornly cloudy days.
Sunlight and warmth are both things that plants need in order to grow healthy and strong and to produce delicious fruits and vegetables for us to eat.
All these factors make winter a tough season to be growing crops on a farm or in your garden. But that doesn’t mean that nothing grows during these months or that there aren’t any great foods that are in season right now.
We’re going to talk about some of the plants that farmers can grow during even the coldest and darkest days of the year. We will also take a look at how humans have created technology to help extend the growing season of some foods that might not do well during the winter.
What’s in Season Right Now?
- Belgian Endives: These pale vegetables with their tightly wrapped, lettuce-like leaves live two lives. During the summer, they are grown in fields to cultivate their roots. But when the cold months come, farmers store endives in dark, damp soil where the roots suddenly come to life and produce almond shaped bundles of fresh greens.
- Cabbage: The best cabbage is ‘frost kissed’ as farmers say. The cooler the weather it grows in, the sweeter it tends to taste.
- Fennel: Too much sun or warm weather can actually cause this plant to do something called ‘bolting’ where it grows too fast and results in a lanky, bitter harvest. Instead, they grow slowly from fall till spring with the result of huge, crispy bulbs that have a licorice-like flavor.
- Rutabaga: Similar to a turnip, rutabagas are firm, slightly sweet root vegetables that prefer to grow in cooler weather. They taste great roasted or mashed with plenty of butter.
- Citrus: Though many types of citrus trees can produce fruit year round depending on conditions, most have the largest harvest during the winter. Changes in temperature and light encourage the plant to start flowering and fruit is usually ripe in the midst of winter! Citrus may not be a local fruit but winter is certainly the best time to buy it from the grocery store.
These are just a few of the crops that grow naturally during the winter. If you see ones on this list you’ve never tried before, head to the farmer’s market or your grocery store to see if you can find them. You can find out even more fruits and vegetables that are in season during the winter using this seasonal food guide.
How Can We Grow More?
Humans have been farming for at least 12,000 years so it makes sense that we’ve got some tricks up our sleeves to grow food year-round.
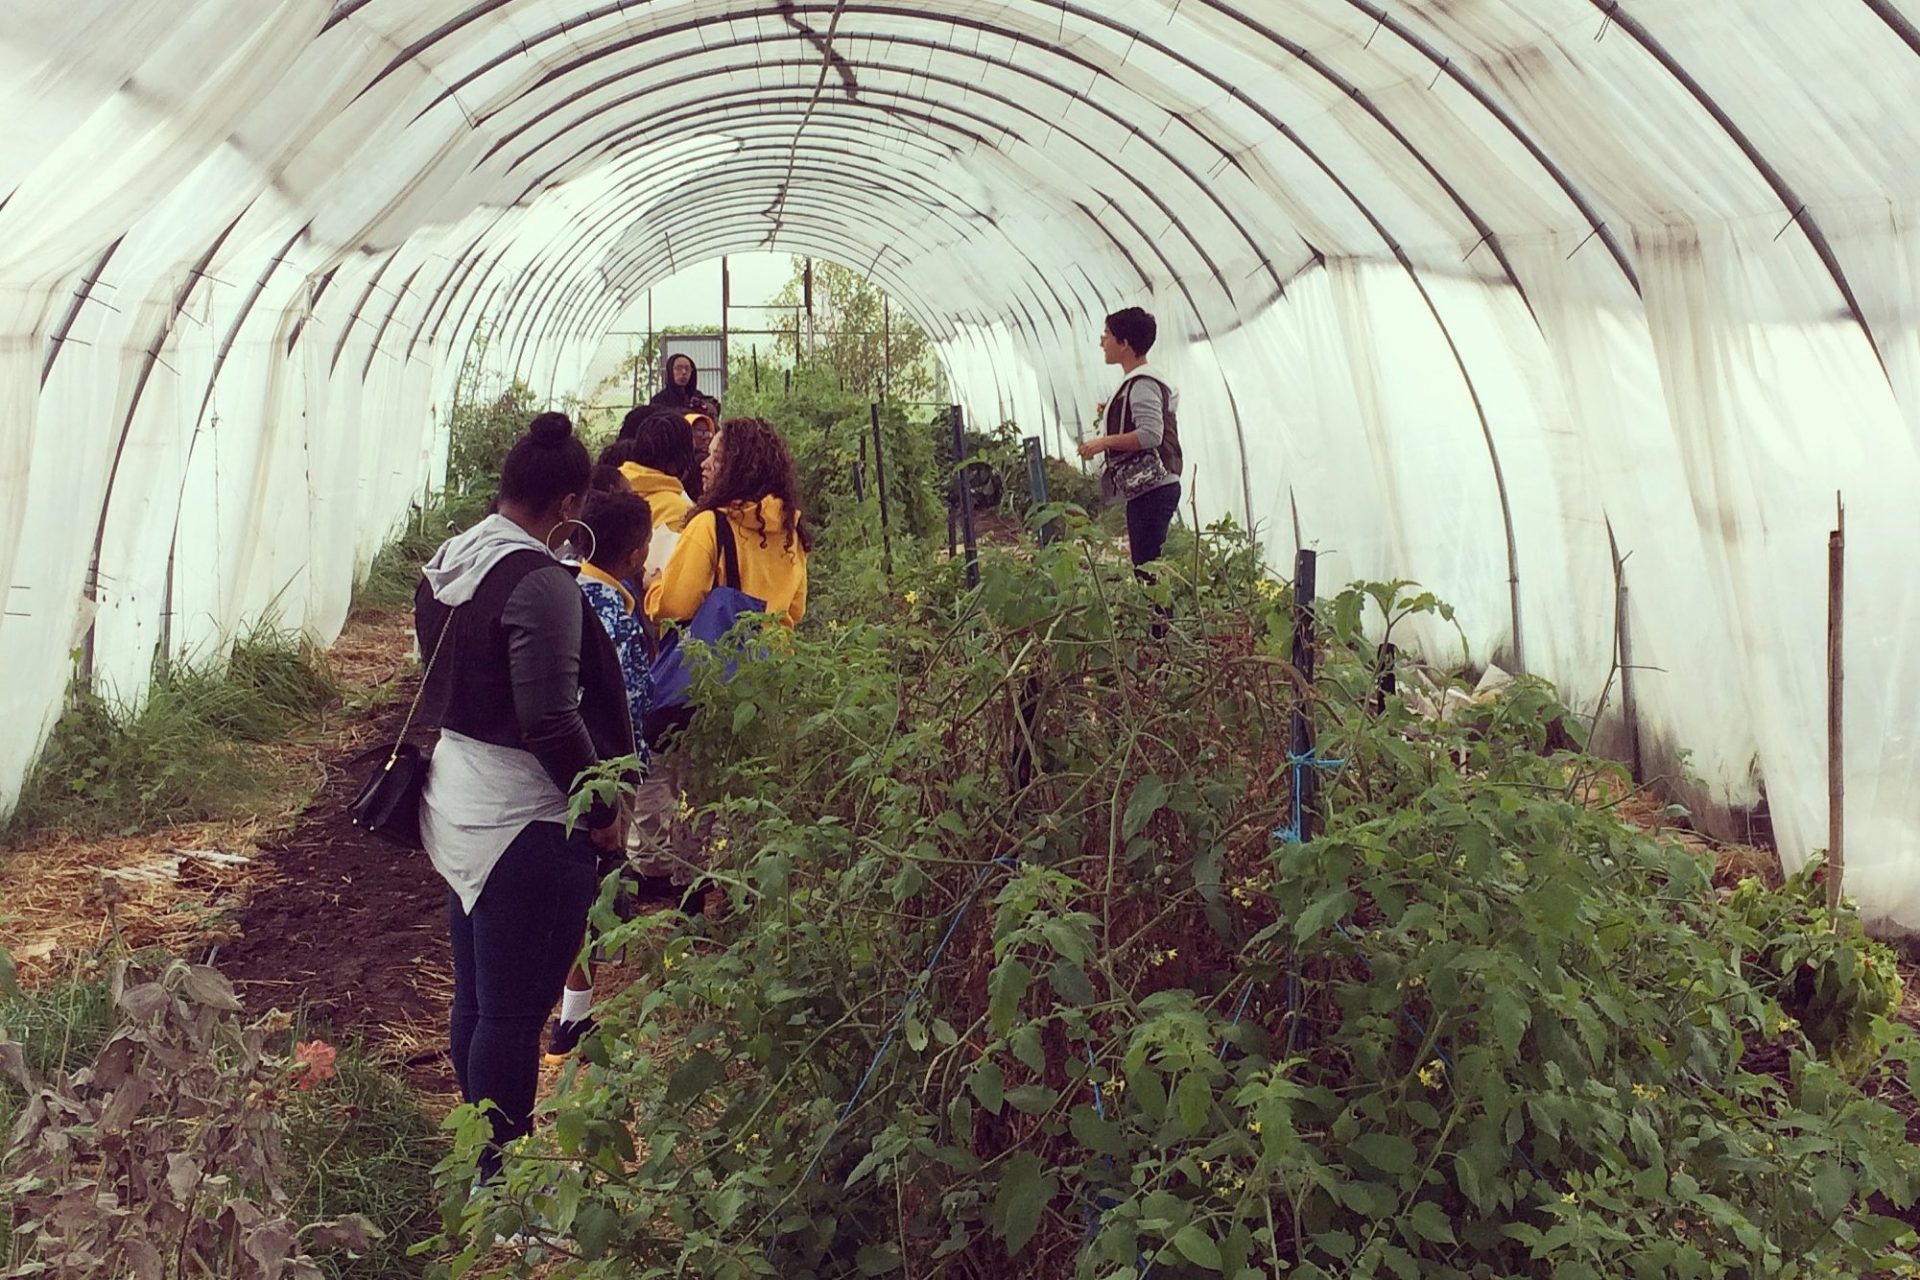
One of the ways we extend the growing season of many summer crops is through greenhouses.
A greenhouse is a building made mostly out of transparent materials (like glass) and can come in a variety of sizes.
Sunlight passes through the walls and roofs and heats the inside. Because it is a closed structure the warm air can’t escape. Thus the inside of a greenhouse stays warmer than the outside.
The idea of controlling the environment where plants grow has been around since Roman times, when wheelbarrows of growing cucumbers were brought inside at night to keep warm.


Many modern greenhouses control more than just the temperature of the growing environment. They also control the level of humidity through ventilation and irrigation. They can control the growing cycle of the plants by adding artificial light or by covering the structure with cloth to make it dark.
Let’s Look at Greenhouse Crops:
- Lettuce: This is probably the most popular greenhouse inhabitant. It grows quickly and has few needs. Everyone loves crunchy green lettuce year round!
- Tomatoes: Tomato plants love warm weather and lots of light so they are a great candidate for greenhouse growth. Many indoor tomato operations use artificial light to achieve big juicy fruits.
- Herbs: Many herbs are actually considered weeds in the wild and therefore make easy growing choices for a greenhouse. This way you can have fresh seasonings throughout the winter.
- Cucumbers: Cucumbers need lots of moisture to become big and crunchy, so greenhouses equipped with misters work well for this likable veggie. They also continue to produce more vegetables as they are picked so the season can be extended even more.
- Beets: Sweet and brightly colored beets are quite cold-tolerant even when grown outdoors so they can do extremely well in unheated greenhouses over the winter. This would be a good choice for a small-scale or backyard greenhouse.
Check out this chart to see when certain fruits and vegetables are in season in Maryland. Green dots indicate crops that are grown outside in fields while orange dots indicate when a vegetable can be grown in a greenhouse or be easily stored for later use.
Now you know that just because it’s dark and cold during winter doesn’t mean we can’t have lots of amazing foods to eat from local growers!
What’s Buried Under the Snow?
You just learned that experienced farmers know how to cultivate fruits and veggies all year round, but our animal friends don't have farms! In this week’s activity we’ll be lending a hand to our backyard birds by making them some tasty pinecone treats.
Many people like to toss birdseed or hang feeders during the summer, but did you know that the best time to provide food for birds is during the winter months?
When it’s warm, there are lots of natural food sources that birds go to, especially all the protein-rich bugs flying around! But during winter, seed sources are smaller and food can often get buried under the snow. Now is the most helpful time to put out snacks for the finches and sparrows that don’t migrate.
Let’s get started on our crafty food project!
Activity: Birdseed Pinecone Treats
Want to lend a hand to your feathered friend? This activity will help you make super tasty treats that you can hang in your backyard or local park for the birds to enjoy. Spend a chilly afternoon sitting by a window and watching your DIY birdfeeder at work!
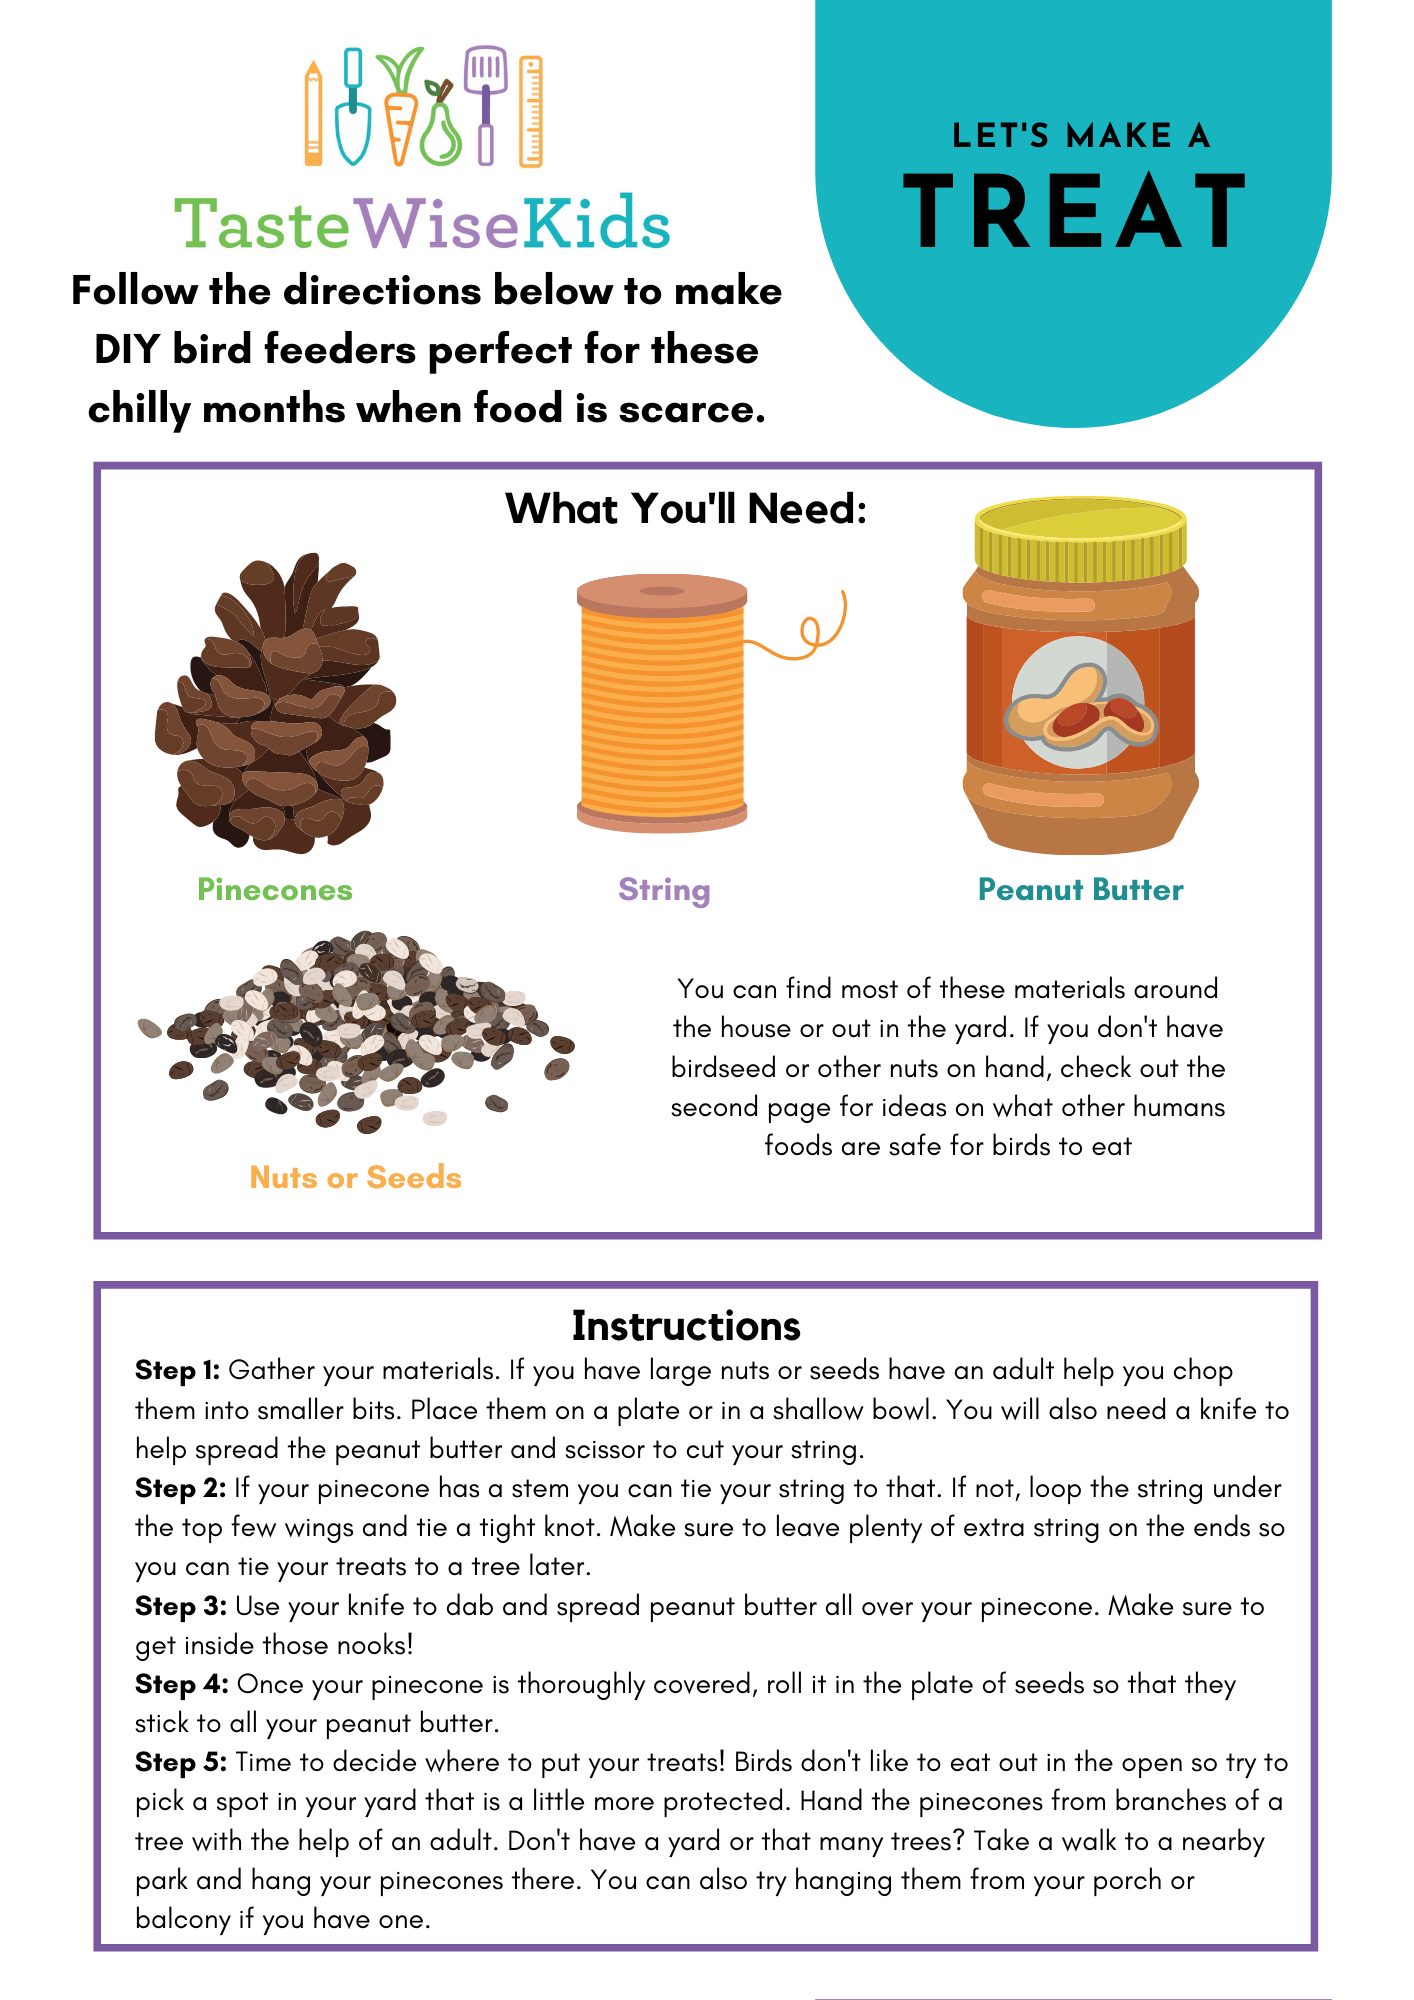
Follow the instructions below or use this printable version to make Birdseed Pinecone Treats perfect for the chilly months when food is scarce.
Don’t forget to share with us!
We would love to see how your treats turned out, send us pictures of the final product on Facebook (@TasteWiseKids) or Instagram (@tastewise_kids)! You can also email us at info@tastewisekids.org.
Instructions:
Step 1
Gather your materials. If you have large nuts or seeds have an adult help you chop them into smaller bits. Place them on a plate or in a shallow bowl. You will also need a knife to help spread the peanut butter and a scissors to cut your string.
Step 2
If your pinecone has a stem you can tie your string to that. If not, loop the string under the top few wings and tie a tight knot. Make sure to leave plenty of extra string on the ends so you can tie your treats to a tree later.
Step 3
Use your knife to dab and spread peanut butter all over your pinecone. Make sure to get inside those nooks!

Step 4
Once your pinecone is thoroughly covered, roll it in the plate of seeds so that they stick to all your peanut butter.
Step 5
Time to decide where to put your treats! Birds don't like to eat out in the open so try to pick a spot in your yard that is a little more protected. Hang the pinecones from branches of a tree with the help of an adult. Don't have a yard or that many trees? Take a walk to a nearby park and hang your pinecones there. You can also try hanging them from your porch or balcony if you have one.

Did you find that peanut butter pinecone a little tempting? Me too! If you’re craving a treat just like our bird friends, we have just the recipe for you. Find below instructions on how to make super-seedy granola bars at home or download the recipe here.
Extra Seedy Granola Bars
Ingredients:
- 1 cup of peanut butter
- ⅔ cup honey or maple syrup
- 2 cups of rolled oats
- 1 teaspoon of salt
- ½-1 cup of nuts of your choice (I like almonds, peanuts or pecans)
- Optional: ⅓ cup chocolate chips
Directions:
- Start by lightly chopping your nuts--you can decide what size chunks you like.
- Mix your peanut butter and honey or syrup together in a large bowl and microwave for 20 seconds to warm gently.
- Add in your oats, salt, and chopped nuts and use rubber spatula to mix until they are coated. If your mixture is looking dry you can add coconut oil or a little more honey/maple syrup until it becomes sticky.
- Line a square pan with parchment paper for easy removal and spoon your mixture into it. Use your spatula or the bottom of a glass to firmly press and flatten the granola into the pan.
5. You can choose to bake these in the oven at 300 degrees for 15-20 minutes or you can chill them in your refrigerator for an hour.
6. If using, melt your chocolate chips in the microwave in 20 second intervals, being careful to stir in between and not overheat. Pour the melted chocolate over the top of your bars and spread to cover everything. Chill until chocolate is hardened.
7. Cut into squares or rectangles and use the edges of the parchment paper to lift them out. Enjoy!
